

Polishing out a scratch means removing clear coat
The same question lands in our inbox every week: can I put the ceramic coating straight onto freshly polished paint? Behind it sits a misconception that reaches a long way past the coating itself. If you think a polish takes the scratch away, you've got half the story. It does something else entirely, and that something runs on a budget you can never top up.
Polishing out a scratch doesn't remove the scratch. It removes the healthy clear coat all around it until the surface sits level with the bottom of the groove. You have 38 to 65 microns of that clear coat, and about eight of them are safe to spend.
Polishing removes the paint beside the scratch
A cutting compound uses aluminium oxide abrasive to grind the clear coat surface down until it sits level with the deepest point of the scratch. The defect disappears because its edges disappear.
That's removal, not repair. Which is why the number that decides everything isn't the compound, it's how much material you can afford to spend.
Modern factory paint is built from four layers. At the bottom the cathodic e-coat for corrosion protection at 15 to 20 microns, above it the primer surfacer at 25 to 40, then the colour-carrying basecoat at only 12 to 20 microns, and the clear coat on top. On European cars the whole stack runs 100 to 160 microns, of which 38 to 65 belong to the clear coat. That top layer is the only one you get to work with.
Of that, 25 to 30 percent counts as safe to remove, roughly eight to ten microns across the entire life of the car. The reason is chemistry. As the paint cures at the factory, the UV absorbers diffuse into the top quarter of the clear coat. Polish that zone away and you've stripped the basecoat of its sunblock. The bill doesn't land straight away, it arrives two or three years later as fading, or as clear coat flaking off.
The good news sits in the numbers right next to it. Wash marks and swirls are typically only one to three microns deep, and holograms from a rotary sit under one. A medium-cut polish on a dual action machine takes off 0.3 to 2 microns per pass. So for exactly the defects that bother you in summer light, the budget stretches comfortably across several full corrections. For a single deep scratch at 10 to 20 microns, it never will.
Run the maths on your own car once and the whole thing stops being scary. With eight microns of headroom and around one micron off per clean medium-cut pass, several full corrections fit into however long you keep the car. The car that gets machined end to end twice a year is the problem, not the single pass after a winter of rollover washes. Protect the paint in between and wash it properly, and you polish less often, which leaves more in the bank.
Paint hardness decides whether one pass is enough
A one-step polish folds correction and gloss into a single pass. It starts with cut and finishes fine, because the abrasive breaks itself down as you work. The separate finishing pass drops out.
Whether that's enough is decided by the paint underneath, not by the bottle. Japanese and Korean makers often run soft, lightly cross-linked clear coats. Those mark up fast and correct just as fast, and they tend to throw fine marring at the finishing stage. German premium paint and the ceramic-reinforced clear coats of recent years are the opposite: swirls take longer to appear and then sit in hard. On those a medium-cut polish hits its ceiling and you need the second step.
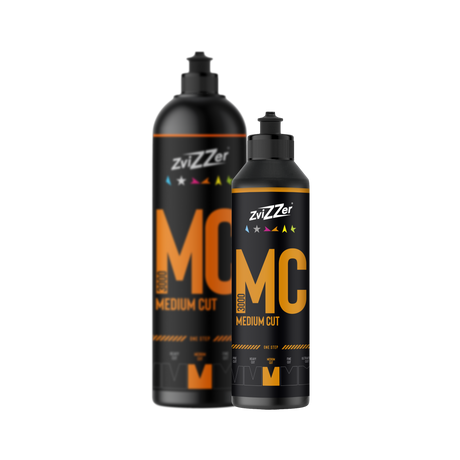
The ZviZZer MC 3000 "Medium Cut" One-Step-Politur (Orange) is built for exactly that middle ground and clears sanding marks from P3000 grit upward. It's water-based, formulated free of silicone and solvents. The silicone point isn't a marketing footnote, it's the heart of why scratches come back.
Plenty of consumer polishes fill the V-shaped groove with silicone oils and waxes instead of levelling it mechanically. Silicone has a refractive index close to the clear coat, so the scratch reads as gone. A few washes with a stripping shampoo pull the oil back out and the scratch is there again. That's the whole difference between hiding and correcting.
For planning, that means: budget for one pass and keep the second in reserve. One side of a daily driver takes about half an hour with the MC 3000, and 250 millilitres covers roughly five to eight full corrections on a mid-size car. If something still shows under the light after the first wipe-off, your test spot tells you whether a harder pad closes it or whether you genuinely need the coarser compound.
The pad supplies half the cut
A polish is only as sharp as the pad it's sitting in. Foam hardness alone controls about half the cutting power you get.
ZviZZer runs this on a colour code that pairs polish and pad: orange on orange, red on red. Want more cut out of the MC 3000, you fit the red pad instead of the orange one. Need a softer finish, you drop to yellow. One polish, three levels of cut. The ZviZZer Thermo Allrounder Pad "Medium" Thermo-Schaumpad (Orange) is the matched baseline, and the rest of the hardness range lives in the polishing pads category.
Thermo foam differs from conventional polishing foam in one way you can feel through a glove: press a finger into it and it springs straight back, where standard foam holds the dent for a moment. Under load the cell structure keeps its shape and runs cooler. That keeps the cut steady across the whole job and stretches the pad's service life a long way.
The second hardware lever is the machine's throw. Eight to twelve millimetres work fine and are the tool of choice on bumpers and A-pillars. Fifteen millimetres is the compromise for everything in between and the sensible place to start, for instance with the FLEX "XFE 2 15 18-EC" 15mm Akku-Exzenterpolierer. Twenty-one millimetres brings pace to bonnets and roofs, and it loses rotation quickly on curved panels, and no rotation means no cut.
Pad size follows the same logic on a smaller scale. A big plate covers bonnets and doors quickly and never seats flat on swage lines and narrow panels. Rather than working the whole car on a mini pad, run the panels with the largest plate that still lies flat there, then swap to the small one for edges, mirror bases and pillars. That saves real time and keeps your passes even, because you're not tipping the pad on edge every few seconds.

Milky white to clear is the whole rhythm
The most common beginner mistake isn't the wrong polish, it's too much of it in too little time. A pea-sized blob on the pad is plenty.
Then you set the pad down on the panel and spread until the foam is wetted right across, before the machine spins up.
Why so little: the foam is open-cell. Four drops in the middle clog the pores at exactly that spot, the clear coat you've just removed stays sitting on top and grinds along as loose debris. Too much product also floats the abrasive in the emulsion, so it stops touching the paint at all. Shake the bottle before you dose, because aluminium oxide is heavier than the carrier oil and settles out.
What follows has fixed numbers. Spread at about 1,000 rpm, work it at up to 1,800 with medium pressure, on sections of roughly 40 by 40 centimetres. Pressure sits at three to five kilos including the 2.0 to 2.7 kilos of machine weight, and your arm moves at two and a half to three centimetres per second. First time out that feels painfully slow and it's still right, because the abrasive needs dwell time.
The real metronome isn't a number though, it's the colour of the film. It starts milky white and opaque, turns translucent, and ends as a clear oily haze with the paint already mirroring underneath. Only then is the polish fully worked and it wipes off with almost no resistance.
That colour change is the only signal you can genuinely trust. Stop before it and you leave coarse abrasive standing, then wonder where the dull haze came from. If the polish only comes off with effort, either it wasn't worked through or there was too much product on the pad. Three to four crosshatch sets with around 50 percent overlap get you there reliably. On edges and swage lines you take the pressure off, because there's less clear coat sitting there by design.
Five colours cover every level of cut
The ZviZZer system spreads five levels of cut across five colours, and the same colour is on the pad. So you're not choosing between products, you're picking a rung on a ladder.
At the top sits the ZviZZer HC 4000 "Heavy Cut" Schleifpolitur (Rot) for deep scratches and sanding marks from P2000. That's the call when hard paint refuses the MC 3000, and it needs a finishing pass afterwards. In the middle sits the MC 3000 in orange, the all-rounder from P3000 that rolls correction and gloss into one. Below it the ZviZZer FC 2000 "Fine Cut" Finish-Politur (Gelb) works as a hologram remover after a coarse step. Blue and green close the ladder off at each end.
What none of those bottles tells you: after polishing, the paint is naked. The cut took the top, slightly oxidised zone with it, surface energy is high, and bird bombs, acid rain and tree sap now soak straight into the pores. An unprotected polish holds up for a few weeks of daily use, and the first hand wash without a slick layer puts fresh swirls straight back in.
Which brings us back to the question at the top. Yes, the ceramic coating goes onto polished paint, just not straight onto it. Every polish leaves carrier oils behind, the ones that keep the abrasive moving while you work, and those oils block the coating from bonding to the clear coat at molecular level. The ZviZZer Clean Top Lackreiniger pulls them off in one wipe.
If you'd rather mix your own, stay at 10 to 25 percent isopropanol in distilled water. Go stronger and the alcohol flashes off faster than the towel can carry the oils away, so it just smears them around. On soft paint, high-strength isopropanol can also swell the clear coat. And tap water instead of distilled leaves micro-crystals of limescale standing on exactly the surface you've just stripped bare.
The panel wipe has a second job that mostly goes unnoticed: it takes away the oils that flatter your own work. Only on a degreased panel does the light show you what actually stayed behind. So the wipe doesn't belong at the end, it belongs between polishing and judging. What you find after it decides whether a second pass follows or the coating can go on.

The fingernail test and raking light set today's limit
Before the machine runs, you settle two questions with your hands and a light: is the scratch even in the clear coat, and how much substance is left?
Whether a scratch will polish out is decided by the fingernail test. You run the nail across the scratch, not along it, and there are three outcomes. The nail glides over with no resistance, then the defect sits safely inside the clear coat and comes out completely. The nail catches slightly, then the scratch sits deeper, and instead of taking it out entirely you round its edges off, which drops the visibility hard without burning through your budget. The nail drops in properly and the bed of the scratch glints pale, then the clear coat is breached and the machine can't help you any more.
The second question is answered by a paint depth gauge. It reads the whole stack, not the clear coat on its own, and professional units land within about three percent or two microns. Take your reference readings at door shuts and on the roof, the panel least likely to have been resprayed. A total under 75 microns on factory paint is a stop sign, because somebody has already polished there before you. Readings well over 200 point to a respray.
You then bring the defects out with a spot beam that mimics direct sun and throws shadow into the scratch grooves. On dark paint work at 6,000 to 6,500 Kelvin, because the cold, harsh beam pushes the white light scatter as hard as it goes against a black background. On white and silver that only dazzles, and 4,000 to 4,500 Kelvin suits better. How to read what you're seeing is spelled out in our piece on spotting swirls in summer light.
That leaves the question of when, and right now the thermometer answers it. Today it climbs to 33.8 degrees, tomorrow to 36. On hot metal the solvents flash off faster than the abrasive can work, the residue bakes onto the clear coat, and wiping it away scratches exactly the panel you've just corrected.
Sunday peaks at 24.7 degrees with over thirteen hours of sun. That's your window, and it's no accident that it pays off right now: German searches for “auto polieren” hit their yearly high in August, well above the spring peak in April. If you want to take Sunday, lay out polish, pad and panel wipe today and pick your level of cut from the polish category or the guide to cut level and grit.

Detailing1 insight: The mistake we hear about most doesn't happen at the machine, it happens at the pad. After one or two panels the foam is saturated with removed clear coat and dried-on polish, and from there you're polishing with a smooth face. The cut collapses, so you add more product and more pressure, and that's exactly where heat and holograms come from. Brush the pad out after every panel and keep a second one ready. Two pads for one car aren't a luxury, they're the cheapest insurance against a second polishing session.
No time for the whole post? Get it summarized: