




Baked-on brake dust and road salt team up against your wheel paint
You wash the wheels, the spokes are shining, and yet there's still a dark brown ring at the back of the wheel barrel that just won't budge. It's the question we get most often in our chat, usually in the form: can you even get baked-on brake dust off any more? Yes. Just not with shampoo, not with a brush on its own, and ideally not in March, after months of road salt sitting on top of it.
Baked-on brake dust comes off chemically, on a cold wheel, with an acid-free iron remover and enough dwell time. The best moment to do it is the seasonal tyre change in October, because the barrel and the back of the wheel are finally exposed and the wheel goes into salt season protected.
The seasonal tyre change finally exposes the wheel barrel
Baked-on brake dust builds up mostly where your tools barely reach during a wash: the inner barrel, the backs of the spokes and the area around the hub. With the wheel off the car, you can get at all of it for the first time without contorting yourself.
With the wheel bolted on, all you really see is the face. The barrel sits behind the spokes and the brake caliper, and that's exactly where the disc throws its dust. If you only work from the front, you're cleaning the part that was already the cleanest. In forum threads about baked-on brake dust, the same photo turns up almost every time: shiny spokes up front, and behind them a barrel the colour of cocoa.
October is when a lot of people swap from summer to winter wheels, following the old rule of thumb of October to Easter. For this week that means: it's raining today in Nordhorn in northern Germany, Monday dries up, and from Wednesday to Saturday the forecast shows a solid dry window with highs of up to 18 °C. If you swap your wheels on Saturday, you'll have four wheels lying free on the ground, and you can work every one of them from both sides.
So plan Saturday as two jobs: first give the summer wheels a proper clean before they go into storage, then decontaminate and protect the winter wheels before they go on. Otherwise the summer set spends six months in the cellar with the crud still on, and the winter set drives into salt season with no protective layer. Both together cost you an extra hour on Saturday and save you a whole day in spring. If the tyre fitter does the swap for you, the same goes for the wheels you get back.
While the wheel is off anyway, give the hub some attention too. Brush the ring-shaped hub mounting face between hub and wheel back free of rust and brake dust, and leave it dry and grease-free, because the wheel is held by friction on exactly that surface. Tighten the bolts with a torque wrench to the manufacturer's spec. That ranges from about 110 Nm on small cars to around 160 Nm on heavy models, and the exact figure is in your owner's manual.
Brake dust plus road salt creeps under the wheel paint
Brake dust is mostly fine iron particles that leave the disc at 150 to 260 °C and melt into the clear coat or powder coat of the wheel. From that moment on, the particle isn't sitting on the wheel any more, it's sitting in it.
Those figures are for normal braking in town. Drive hard or come down long descents and disc and caliper temperatures climb past 400 °C. That's why the front wheels almost always take more of a beating than the rears, and cars with big brakes more than small hatchbacks. Shampoo just slides straight over baked-on brake dust, because there's nothing left on the surface for it to grab.
In winter the second factor kicks in. Road salt is sodium and magnesium chloride, it pulls in moisture and keeps the embedded iron permanently wet. Iron plus salt water means rust, right in the middle of the paint layer. Every little stone chip on the rim lip becomes a way in for moisture to creep under the clear coat.
What happens next is called filiform corrosion: white, thread-like tendrils under the paint that you can't polish out. On diamond-cut wheels, where the aluminium is protected only by a thin layer of clear coat, it moves especially fast. Once that's growing under the lacquer, the only fix is a wheel refurbisher with a lathe. The brake dust sitting on your wheel as a brown film in October may well be paint damage by March.
That's why wheel makers like BBS and OZ and car makers like BMW specify pH-neutral, acid-free cleaners for their wheels. It makes the chemistry choice easy: it has to dissolve the iron without attacking the paint layer that's protecting the aluminium from the salt in the first place. That's exactly what thioglycolate-based cleaners do.

Below ten degrees the gel needs ten minutes
Baked-on brake dust lets go when an acid-free iron remover sits long enough on a cold, dry wheel. At October temperatures under 10 °C, long enough means at least ten minutes instead of the usual three to five.
The active ingredient in these cleaners is a thioglycolate, a salt that clamps around iron and turns it into a water-soluble compound. That compound is naturally reddish-purple, so the cleaner changes colour exactly where the iron is. For you that means: within a few minutes you can see which areas are contaminated, and the dissolved iron rinses off with the water instead of being dragged across the wheel by your brush.
Here's the routine for Saturday: take the wheel off, rinse off loose dirt with clean water and let the wheel dry again, because water dilutes the gel the moment it goes on. Then spray the cleaner on generously from the bottom up, making a point of hitting the barrel, the hub and the backs of the spokes. In the cold, give it ten minutes, rinse hard from the top down until no more pink haze runs off, and wipe the wheel dry straight away.
If anything is still left after that, give just that spot a second, short pass. An hour of dwell time doesn't get you any more than ten minutes, because at some point the active ingredient is saturated. Also work wheel by wheel: spray, wait, rinse, dry, then the next one. Spray all four at once and by the time you reach the fourth, the rinse water on the first is already drying into water spots.
On Saturday the cold actually works in your favour. At 14 °C and overcast, the gel won't dry on, and the wheels come out of the cellar cool. In summer you'd have to wait a good quarter of an hour after every drive for the residual heat from the brakes to leave the wheel. The one condition: don't lay the wheels out in full midday sun, not even in October.
Two things stand out the first time. First, the gel smells of sulphur, some say of rotten eggs. That's not a sign of an old product, it's the active ingredient itself, so work outdoors or somewhere with plenty of fresh air. Second, a wheel off the car is the safest place for this much chemistry: on the car, the overspray always lands on the brake disc too, and the next time you brake, the residue bakes on right there.
Three products cover the wheel, the arch and the protection
For a pre-winter wheel decon you need three things: an acid-free wheel cleaner in gel form for the wheel, an iron remover for the paint around it, and a wheel sealant for the winter. That's all it takes.
For the wheel itself we use Dr. Wack P21S "HIGH END" Wheel Cleaner 750 ml. The gel clings to the vertical wheel face instead of running off in seconds, turns violet to black wherever brake dust sits, and is also cleared for TPMS sensors. Its limit: tar and rubber deposits aren't iron compounds, so it barely reacts to them. In the AUTO BILD comparison 22/2021 it scored 183 out of 200 points.
Brake dust doesn't just land on the wheel, it also ends up on the paint behind it: the wheel arch, the sill and the edges behind the wheels. That's what Dr. Wack A1 "Flugrost-Entferner Gel" 500 ml is built for. At pH 7.4 and 140 mPas, it stays put as a film on vertical panels. According to Dr. Wack, it isn't meant for the wheel itself.
So the split is clear: P21S on the wheel, A1 on the arch. You'll find more sizes in the Rust remover category.
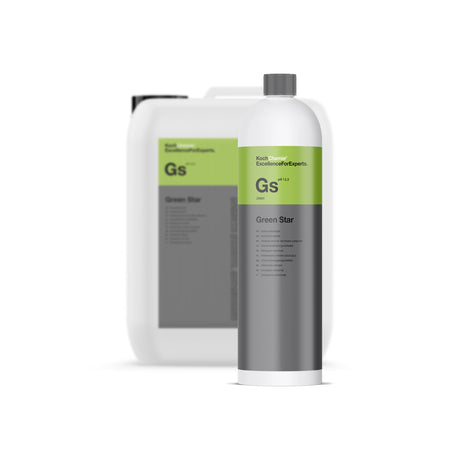
For protection after cleaning, that leaves Koch-Chemie Ceramic Rims "Cr0.01" 30 ml. According to the manufacturer, the ceramic layer lasts up to twelve months and stands up to both acidic and alkaline wheel cleaners. It's only for painted wheels; polished or bare aluminium needs something else from the Rim sealing range. 30 ml is enough for one set of wheels, so for a second set you'll need a second bottle.

Warm wheels and dried-on gel leave violet streaks
The most common mistake with baked-on brake dust is spraying the gel onto a warm wheel or letting it dry on. The film skins over before the reaction is finished, and you're left with sticky violet streaks instead of clean metal.
You can check for a warm wheel with the back of your hand: if you can't rest it on the wheel face for five seconds, it's too warm. Straight after the drive to the tyre fitter, the wheel is almost always too warm. So wait at least a quarter of an hour after the last hard stop, or start with the wheels that have been lying around longest.
Second mistake: reaching for acid because it shows results faster. Acidic wheel cleaners really do cut through baked-on crust quickly, but often can only stay on the wheel for one to two minutes. They creep under the clear coat at every stone chip. On diamond-cut, polished and chrome wheels they have no business at all. When an acidic cleaner still makes sense is covered in our comparison Acid-free or acidic wheel cleaner.
Third mistake: home remedies and hard tools. Baking soda, vinegar and a wire brush won't shift baked-on brake dust, they just push it around or leave scratches. The hard brake dust particles are harder than the clear coat, so rubbing over undissolved particles scratches more than the brush itself. Why home remedies hit a wall here is explained in Cleaning wheels with home remedies. Dissolve first, then touch: that order applies to every wheel.
Fourth mistake: claying without enough lube. If a few rough spots are left after the gel, a clay bar can take them off, but only on a dripping-wet wheel, in short straight passes and with no pressure. On half-dry paint the clay grabs and leaves a dull haze of fine scratches that then has to be polished out. If the wheel is smooth after the gel, just skip the clay.
A ceramic coating keeps brake dust loose all winter
A wheel sealant won't stop brake dust from forming, but it does stop it from baking in so deep. On a sealed wheel, a pH-neutral cleaner and clean water are usually all you need in winter.
It comes down to the surface: the ceramic layer closes the tiny pores in the clear coat where hot particles would otherwise lodge. Whatever lands on a sealed wheel sticks to the protective layer instead of the paint and rinses off at the next wash. Salty road spray beads off instead of sitting in every stone chip.
But sealing also means the wheel has to be genuinely clean first. Any iron you lock in under the sealant stays trapped there for a year. That's why sealing comes at the end of Saturday: gel, rinse, dry, then lay down the sealant, let it flash off and buff it out. More on why ceramic outlasts wax on wheels in Sealing wheels against brake dust.
From then until spring, one simple rule applies: wheels first at every wash, so no loosened iron runs over freshly washed paint, and a look into the barrel once a month. If the ring starts going brown again, a quick pass with the gel is enough before anything can bake on. Come April, you'll have a wheel on the ground that only needs a wash.

Detailing1-Insight: Every spring we see wheels that went into storage in autumn with only the face washed. The crud in the barrel then has six months to work, and by April the first white threads show up under the paint at kerb damage.
So on Saturday, grab a torch after rinsing and shine it through the spokes from behind: wherever it still glows brown back there, the wheel isn't done, no matter how the face looks. The front wheels almost always need a second pass, because that's where the bigger brakes sit.
No time for the whole post? Get it summarized:


