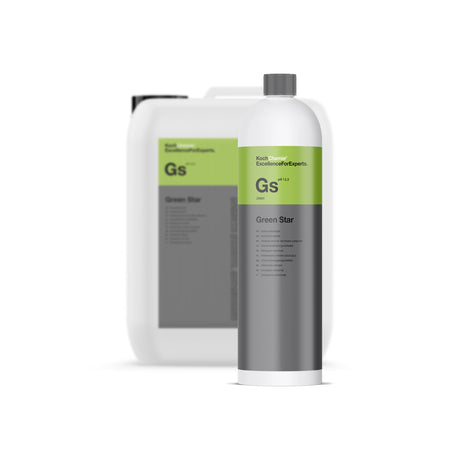
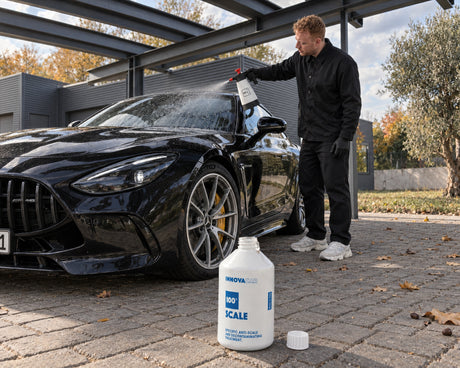
Togliere le macchie di calcare dai vetri dell'auto senza graffiarli
Daniel von Detailing1 |


Koch-Chemie × COLOURLOCK
COLOURLOCK "Blocker" strato barriera contro le decolorazioni che riaffiorano
Barriera contro le macchie di colore sulla pelle
What is the COLOURLOCK barrier layer against discoloration? It is the isolation step in the dyeing process: COLOURLOCK "Blocker" applies a transparent barrier film between the substrate and the new color so that tire abrasion, ballpoint pen ink, adhesive residues, UV shadows, and mold traces do not migrate back through the fresh layer of color. Developed from leather repair practices, it is now under the umbrella of Koch-Chemie.
The COLOURLOCK barrier layer against discoloration is the work step between cleaning and color application that DIY instructions almost always omit. COLOURLOCK "Blocker" dries into a thin, transparent insulating film that traps embedded dyes, fats, and plasticizers underneath it, rather than allowing them to be pulled back up by the fresh color. Two thin layers are sufficient, applied with a sponge or spray gun, with each dried individually.
Practical tip from Detailing1: Perforated leather is the place where the barrier layer most often goes wrong. We regularly receive inquiries about ventilated seats where the rows of holes are clogged after dyeing: the Blocker runs into the perforation, dries there into small plugs, and the seat ventilation subsequently pulls noticeably weaker. The countermeasure takes five minutes and must happen before it dries — use a toothpick to poke through each row of holes while the film is still wet, and only then use the hairdryer. Anyone who drills through the dry surface instead will tear open the fresh barrier layer around each hole.
Fresh leather dye acts as a solvent for a few hours: it softens the old surface and reawakens the very discoloration it is actually intended to cover.
The leather industry calls this migration. Dissolved dyes, fats, and plasticizers follow the moisture gradient upwards, similar to how a drop of coffee on paper does not form its rim in the center, but on the outside where it dries. This means for you: after dyeing, the stain is no longer under the new layer, but inside it — and it becomes more distinct with every sunny day.
The time delay is the treacherous part. Immediately after dyeing, the surface looks uniform; the result seems complete. It takes weeks for the legacy residue to work its way through, and heat accelerates it: a seat in the summer sun will show in two days what takes half a year in winter. Those who skipped the barrier layer will notice this not on the day of the work, but in the next season.
The legacy issues this affects are well documented. Tire abrasion from the trunk, ballpoint pen and marker lines, UV discolorations on sun-exposed areas, bleeding adhesive from old repairs, and black mold on leather that has been damp for a long time are at the forefront. What they have in common is that cleaning only reaches them to a certain depth — the rest remains in the leather, waiting for the next solvent.
The barrier layer does not work chemically against the discoloration, but spatially: it cuts off its path upwards instead of dissolving it.
COLOURLOCK "Blocker" is applied to the dry surface after cleaning and dries to a thin, transparent film. This film is dense enough to keep embedded dyes and fats beneath it, and remains open enough so that filler, leather dye, and finish subsequently adhere cleanly to it. In practice, this means: you lose neither adhesion nor texture and gain a separation layer that was not there before.
Application is done in stages. For individual areas, work with the sponge in dabbing motions, two layers, each dried thoroughly with a hairdryer. For large-scale work — a complete seat set, a sofa landscape — a spray gun at high pressure is the method to achieve a thin and uniform film. And if a problem area continues to show through during the color buildup, the Blocker can be reapplied thinly in between, always with drying in between.
Equally important is what the Blocker is not. It does not clean, it does not fill cracks, and it does not replace a top coat. It has a single, clearly defined task in the dyeing sequence: the separation between what was and what is to come. This limitation is exactly what makes it reliable — a product that also intended to condition or seal at this stage would dilute the barrier effect.
Both are listed in the product range under leather primers; both are applied to the surface before the color. That is where the similarities end.
The adhesion promoter from COLOURLOCK works in depth: COLOURLOCK "Leather Primer" penetrates the finishing — the lacquer-like color and protective layer on pigmented smooth leather — and creates an adhesion bridge there for the leather dye. It remains soft to the touch and reduces color consumption because the dye no longer runs into an absorbent substrate. Its job is bonding.
The Blocker does the opposite: it lays on top as a closed film because separation is its job. That is why the data sheet lists a sequence that surprises many — no primer comes before the Blocker. Anyone who applies the adhesion promoter first works against the purpose of the barrier layer and later wonders about a bleed-through they thought they had prevented at great expense. On plastic parts in the interior, the plastic primer from COLOURLOCK takes over, not a leather product.
What we at Detailing1 observe again and again: customers order the adhesion promoter and fully expect it to handle the bleed-through as well. The follow-up question comes three weeks after the dyeing, when blue shadows reappear on a beige seat surface. Anyone who has both products on the shelf saves themselves this detour — they are two tasks, and they need two bottles.
The barrier layer is step three, not step one. What can be removed is removed beforehand — the Blocker is there for the rest, not for a shortcut.
At the beginning is degreasing: the degreaser from COLOURLOCK removes skin oils, care product residues, and silicone films so that anything can adhere at all. If a visible discoloration is sitting in the color layer, it belongs to the discoloration remover from COLOURLOCK before being blocked: every gram of dye that goes into the cloth now cannot migrate upwards later. Afterward, the surface must dry completely — residual moisture under the barrier film is the second most common cause of rings.
Then the Blocker comes in two thin layers with drying in between, and only then does the color buildup begin: filler for brittle areas, then the opaque leather dyes from COLOURLOCK in several thin coats instead of one heavy one. The conclusion is the Top Coat & Finish from COLOURLOCK as a wear layer, via which the gloss level and feel are also set — matte, glossy, or high-gloss, if necessary adjusted with matting additive, feel additive, or crosslinker.
From the daily Detailing1 routine: The most common reason for a disappointing result is not the wrong product, but a schedule that is too tight. The complete process from degreasing to top coat is half a day for two front seats, with drying breaks that cannot be shortened. The first time, it feels long, and that is normal — by the second seat, every move is instinctive, and the effort is cut in half.
The Blocker is a specialist, and specialists have sharp boundaries. You should know three of them before you order.
The first limit is the substrate. The barrier layer belongs on pigmented smooth leather with intact finishing — i.e., on leather that already carries a top layer. Open-pored aniline leather, nubuck, and suede absorb any film-forming application and lose exactly what defines them: the soft, matte, breathable surface. There, the Blocker is not a lifeline, but the fastest way to a stain that looks worse than the original.
The second limit is safety-relevant and non-negotiable. Seat flanks of modern cars house the tear seam of the side airbag, and this seam must open upon deployment. Dye and barrier layers must neither stiffen nor glue them together. If your damage is on or directly at this seam, this is not a case for chemistry from a bottle, but for an upholsterer or a leather restorer who opens and resets the seam professionally.
The third limit is what we see most often, and it is a real negative: non-degreased surfaces. We often see seats where the Blocker was applied cleanly, but the surface was only wiped off instead of degreased beforehand. After four to six weeks, matte halos appear around the contact zones — the film never bonded properly because it was lying on skin fat. The same applies to application that is too thick: two wafer-thin layers keep it sealed, one heavy one makes the surface stiff and clogs the perforation.
And an honest assessment of the result: The Blocker prevents bleed-through; it does not match a color tone. For a surface in the direct field of vision — seat center, armrest, door panel — color matching is the most demanding part of the whole work, not the chemistry underneath. Anyone who dyes an entire seat surface in one go has it easier than someone who wants to fit a palm-sized spot invisibly into an aged environment.
The decision does not depend on the leather, but on its history. If you know what the area has seen before, you also know whether it needs to be blocked.
If light-colored seats show jeans blue that cleaning only partially removes, the Blocker belongs between cleaning and color. If ballpoint pen, permanent marker, or adhesive residues from an old repair are involved, likewise. If a vehicle has been smoked in for years or has been damp for a long time, even more so. And if a surface has been dyed before and the old stain returned, the missing barrier layer is the most likely cause. If, on the other hand, clean, merely faded leather receives a pure color refreshment, you do not need it — then the Blocker is a work step you can skip.
When choosing the container size, the area decides, not the requirement. The 100 ml covers the classic individual cases: a seat bolster, a steering wheel, an armrest, a door panel. The 1000 ml / 1 liter is intended for complete sets and for everyone who works with a spray gun — consumption per area is higher there, but the film is more uniform. You can find all preparation products one level higher under Leather Primer from COLOURLOCK, the complete sequence under Dyeing & Finish from COLOURLOCK.
The test step that is in no instruction manual costs one day and, in case of doubt, saves you the entire job: Apply your dyeing process first on a hidden area — seat underside, backrest, bottom side bolster —, then park the vehicle in the heat for one sunny day and check in the evening. Migration is temperature-driven, and what does not come through in 24 hours under heat will not come through in the summer either. This one test area is the difference between a dye job that holds and one that you do a second time next season.
Troppa scelta in Barriera antiscolorimento di COLOURLOCK? Fatti aiutare a scegliere:
Daniel von Detailing1 |

Daniel von Detailing1 |

Daniel von Detailing1 |

Daniel von Detailing1 |

Jasper von Detailing1 |

Daniel von Detailing1 |

Daniel von Detailing1 |

Daniel von Detailing1 |

Jasper von Detailing1 |

Jasper von Detailing1 |

Daniel von Detailing1 |

Daniel von Detailing1 |