

L'auto si appanna dentro: perché un vetro pulito resta limpido più a lungo
Daniel von Detailing1 |


Koch-Chemie × COLOURLOCK
Stucco nero carteggiabile per riparazioni della pelle
Koch-Chemie × COLOURLOCK
Stucco bianco per pelle, per riparazioni lisce
Koch-Chemie × COLOURLOCK
COLOURLOCK "Leather & Plastic Paste" Stucco Termoindurente per Riparazioni Rapide
Stucco termoindurente per pelle e plastica
What are COLOURLOCK fillers and putties? Repair compounds that replace lost material in leather before it is dyed: elastic, sandable fillers in black and white for cracks, scratches, and worn seat bolsters, plus a heat-curing paste for holes, chipped edges, and plastic parts.
COLOURLOCK fillers and putties are the brand's repair compounds that replace missing substance in leather before color is applied on top. The air-drying filler remains elastic after curing and can be sanded finely, while the heat-curing paste builds a solid structure under hot air. The filler smooths the surface, the paste restores the shape, and both work underneath the color rather than next to it.
Pro-tip from Detailing1: The most expensive mistake on a seat bolster is a single thick layer. We regularly receive inquiries about repairs that have torn open again after a few weeks, and almost always the crack was filled in one go. Thick material dries on the outside first, while the inside remains soft and shrinks later — the surface sinks and breaks along the old edge. Instead, apply the filler in several ultra-thin layers, let each layer dry completely, and pull the material about five millimeters beyond the crack onto the intact surface. This overlap anchors the repair into the healthy leather instead of just placing it into the gap.
Nobody sells fillers to people who think leather looks fine. They go to those who have damage in front of them and need to deliver a result. That is exactly where COLOURLOCK comes from: the brand has been supplying saddlers and leather restorers for decades and is now part of Koch-Chemie from Unna. In our shop, the line is therefore listed under Koch-Chemie × COLOURLOCK.
You can tell that by the repair compounds. They are not intended as standalone products, but as one station in a chain that continues before and after. Before filling, the surface is cleaned, degreased, and the raised edges of the crack are sanded smooth. After filling, leather color and Top Coat are applied. Anyone who buys only the middle station and ignores the others will get a repair that looks like one.
That is why the filler is not optimized for hardness. In repair practice, a material that cures rock-hard is a problem, not a quality feature: it concentrates the tension on one point, and the area adjacent to the repair will be the next to tear. COLOURLOCK fillers yield instead. For you, this means the repaired area ages at the same rate as the leather next to it.
The second point that a professional repair background provides is the classification by damage type. A fine scratch, a torn seam area, and a broken-off corner are three different tasks, even if they all look like a hole. COLOURLOCK provides separate materials for this instead of selling one universal paste for everything. That may seem fussy, but it saves you the round where you realize the material was too soft or too coarse for your case.
The standard case is surface damage on pigmented smooth leather: scratches, fine cracks, worn seat bolsters, scuff marks on the entry edge. This is what the leather fillers with COLOURLOCK "Filler" (Black) and COLOURLOCK "Filler" (White) are for. Both air-dry, remain elastic, and can be finely sanded after curing until the surface is level again.
The second class begins where material is missing rather than just the surface being damaged: a hole, a broken-off corner, or a torn-out corner on a door panel. This is where the putty compound COLOURLOCK "Leather & Plastic Paste" is used. It is applied with a spatula, roughly shaped, and then cured with hot air — only the heat cross-links the polymer into a durable structure.
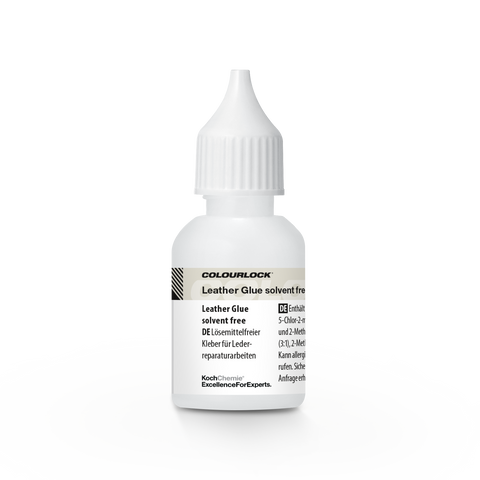
The third class is one level higher and cannot be solved with filler alone. A crack that is under tension must be stabilized from behind before filling even begins. The leather glue is used for this: the edges of the crack are glued together, and for larger cracks, a thin fabric is used as a backing. Only on this closed base does the filler make sense.
There is one adjustment screw between the materials that many overlook: stability. On a horizontal seat surface, the filler levels out beautifully on its own; on a vertical bolster, it runs downward. For such areas, the material can be thickened with the thickener COLOURLOCK "Thickener" until it stays where you put it.
For an individual repair, the 20 ml container of either filler or paste is more than enough. A seat bolster uses only a few grams because you work in thin layers — the rest goes into the drawer to wait for the next damage. Those who repair regularly should choose the liter containers.
The two fillers and the paste do not differ in their label, but in their curing mechanism. The filler dries physically: the water evaporates, the polymers move closer together, and form a film that can stretch under stress. That is exactly why it sits on surfaces that are moved daily — seat bolster, seat surface, steering wheel rim.
The paste cross-links chemically, triggered by heat. After using a hairdryer, a hard, dimensionally stable mass is created that hardly shrinks and supports edges. In other words: it holds a shape that the filler could not, and it is right where something needs to be rebuilt instead of just smoothed. On a soft, heavily moved surface, this very hardness is the disadvantage.
The color choice for the filler follows the same logic of preparation. Black fills dark leather, white fills light — not for cosmetic reasons, but so that the subsequent color layer can remain thin. A white dot under black leather color requires layer after layer until it disappears, and each additional layer makes the area stiffer and more noticeable than its surroundings.
The materials are not interchangeable, and this is where their limits lie. We tested the paste on a hair-fine crease in a seat bolster: after sanding, the treated spot was significantly larger than the original damage because the hard material could not be removed with less pressure. Conversely, the filler cannot support a broken corner — it sinks while drying, and you have to start all over again.
Two further cases are completely outside this category. Open-pored aniline leather without a pigment layer absorbs any filler as a visible spot because there is no opaque color layer to conceal the buildup later. And leather that is brittle over a large area rather than damaged at a specific point does not need a repair spot, but a treatment of the entire surface — this is what the filling color COLOURLOCK "Binder" (Neutral) from the leather colors is built for.
The process is always the same, and the sequence is the actual substance of the repair. First, clean and use the degreaser to remove all residues of skin oils and old leather care products. No filler will adhere to a greasy surface, and you cannot see that the area is greasy beforehand.
Then the edge of the crack is prepared: pull any raised fibers and sharp edges flat with fine sandpaper so that nothing remains standing up. If the crack is under tension, now is the time for the backing. Only then does the filler follow in thin layers, each one completely dried through, each one pulled about five millimeters beyond the damage into the intact surface.
After the last layer, sand until the spot is on the same level as the surroundings. Check this with the back of your hand instead of your eyes — the fingertips are too insensitive for the shallow dent that will still be visible in raking light after dyeing. This is followed by leather color and finally a Top Coat, which brings the repair under a shared protective layer with the rest of the surface.
What the sanding also removes is the grain. A filled and sanded spot is smoother than the grained leather around it, and in raking light, this difference remains visible even after dyeing. Therefore, keep the treated area as small as possible and fill the crack plus a finger's width next to it instead of the entire bolster. For larger areas, the structure is recreated with a texture stamp before the color is applied.
A word on hot air, because this step makes most people shy away: the paste needs heat, but the leather next to it can only tolerate it to a limited extent. Work with distance and in short intervals rather than continuous bombardment on one spot, and cover adjacent plastic parts. Leather treated with too much heat shrinks and becomes hard — damage that can no longer be fixed with filler.
Plan for an afternoon for your first time rather than an hour, and expect the moment when the spot looks worse than before. After sanding, the area is matte, light, and larger than the original crack. This is part of the process and disappears with the color. From daily life at Detailing1, we know of dropouts primarily at exactly this point — not because of the craftsmanship, but because of the interpretation of an intermediate stage.
To be honest: if your damage is a superficial scratch in pigmented smooth leather and you just want it to be invisible, you do not need filler. A scratch remover like COLOURLOCK "Scratch Away" works directly on the color layer without you having to build up and sand material — for the standard case, it is the faster and gentler solution.
The universal sets from accessory shops, usually sold as liquid leather, lie in between. They include a filler and a few shades for mixing and do indeed cover the small scratch. Their limit lies in elasticity and the opacity of the substrate: on a seat bolster that is stretched daily, the buildup often only lasts for weeks, and a uniformly tinted filler forces you to use more color layers than necessary.
The difference only becomes visible over time, and that is precisely what makes the assessment difficult — immediately after the repair, both paths look equally good. After a summer with heated seats, it becomes apparent whether the material has kept up with the movement or whether the old crack line is showing through again. We frequently see seats where the second repair requires more work than the first would have, because the old filler mass must first be removed.
We clearly advise against hardware-store putty and superglue. Both cure hard and brittle, both sit as sharp edges in the soft leather after a few weeks, and both can only be removed with significant mechanical effort. The crack is then no longer the problem; the edge around the repair is.
Run your fingernail across the spot. If it does not get caught, the damage is in the color layer, and you can proceed with a scratch remover. If it hooks, substance is missing — then the work begins with the filler, in black for dark leather and white for light.
If the crack can be pulled apart with your fingers, it is under tension. Then, before filling, you must glue it; for larger cracks, use fabric from behind. If, however, a piece of material is missing or an edge has broken off, this is a case for COLOURLOCK "Leather & Plastic Paste" with hot air. And if the leather is brittle over a large area rather than damaged at a specific point, no repair spot helps, but rather a filling color over the entire surface.
If you do not want to hunt for the components individually, you will find them bundled in the repair sets, in which glue, filler, and color match each other. The brand's other repair products are one level higher: Back to repair by COLOURLOCK.
And the most important sentence of all: the filler is not the part of the repair you see later — it is the part that determines whether you see it at all. The afternoon you spend on thin layers and clean intermediate drying is the same effort you would otherwise have to repeat next spring.
Troppa scelta in Riempitivi e stucchi di COLOURLOCK? Fatti aiutare a scegliere:
Daniel von Detailing1 |

Daniel von Detailing1 |

Daniel von Detailing1 |

Daniel von Detailing1 |

Daniel von Detailing1 |

Jasper von Detailing1 |

Daniel von Detailing1 |

Daniel von Detailing1 |

Daniel von Detailing1 |

Jasper von Detailing1 |

Jasper von Detailing1 |

Daniel von Detailing1 |